
Are you ready to bring your web application to life with dynamic JSP pages? Creating a JSP file in Spring Tool Suite (STS) might seem tricky at first, but with the right steps, you can do it quickly and confidently.
This guide is designed just for you—breaking down the process into simple, clear actions that anyone can follow. By the end, you’ll have a solid JSP file ready to enhance your Spring project. Keep reading, and discover how easy it is to add this powerful feature to your toolkit.

Credit: www.youtube.com
Setting Up The Environment
Setting up the environment is the first crucial step toward creating a JSP file in Spring Tool Suite (STS). Without the right tools and configurations, you might face avoidable errors that slow down your progress. Getting your setup right ensures a smooth development experience and lets you focus on writing clean JSP code.
Installing Spring Tool Suite
You need to have Spring Tool Suite installed on your machine before starting any JSP development. STS is a powerful IDE tailored for Spring projects, and it simplifies managing your application components.
Head over to the official Spring website to download the latest version of STS. Choose the version that matches your operating system and follow the installer instructions.
- Make sure you have a stable internet connection for downloading necessary plugins.
- Once installed, launch STS and check if it opens without errors.
- If you encounter issues during installation, try running the installer as an administrator.
Have you ever skipped verifying your IDE installation and wasted hours troubleshooting? Don’t let that happen to you here.
Configuring Jdk And Server
Before you create JSP files, your environment needs to recognize the correct Java Development Kit (JDK) and a server like Apache Tomcat. STS requires these configurations to compile and run your JSP pages properly.
Open STS and go to Window > Preferences > Java > Installed JREs. Add the path to your JDK installation if it’s not already listed. This step ensures your IDE uses the right Java version.
Next, configure your server by navigating to Window > Preferences > Server > Runtime Environments. Click Addand select Apache Tomcat (or your preferred server). Point it to your local server installation folder.
- Verify that the server runtime environment is active in your STS workspace.
- Test the server by running a simple web project to confirm everything is connected.
Do you know which server version matches your JDK? Using incompatible versions can cause frustrating deployment errors.
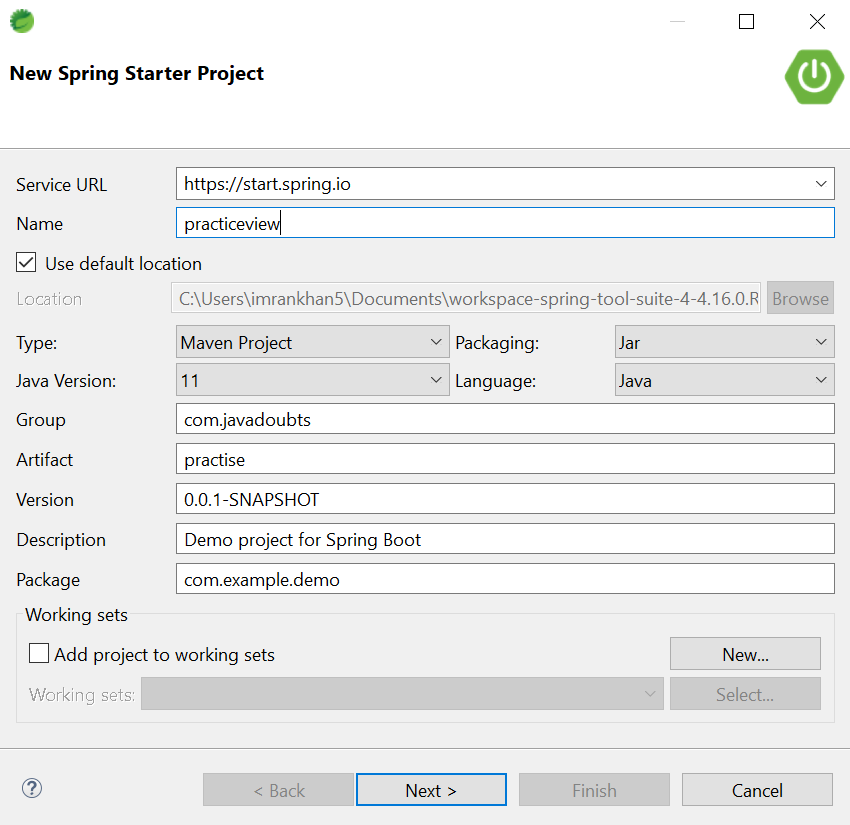
Creating A New Spring Project
Starting a new Spring project in Spring Tool Suite (STS) sets the foundation for your entire application. The process is straightforward but requires attention to detail to ensure your project is set up correctly from the beginning. Creating a new project properly saves you time and frustration later, especially when integrating JSP files.
Selecting Project Template
When you open STS, the first step is to choose the right project template. You’ll see several options like “Spring Starter Project” and “Spring Legacy Project.” For most modern applications, pick the Spring Starter Projectbecause it provides a ready-to-use setup with popular dependencies.
Inside the template chooser, you’ll find different starters for web, data, security, and more. If your goal is to create JSP pages, make sure to include Spring Weband Thymeleaf or JSPdependencies. The template helps by pre-configuring essential files, so you don’t have to add everything manually later.
Configuring Project Settings
Once you select the template, STS prompts you to configure project settings. This includes naming your project, choosing the Java version, and setting the packaging type (usually warfor JSP-based apps). Naming your project clearly helps avoid confusion, especially if you manage multiple projects.
You will also select the project location on your computer. Keep the path simple and avoid spaces or special characters to prevent build issues. Another critical choice is the Spring Boot version; pick a stable release that matches your dependencies.
Have you ever faced issues because of mismatched Java or Spring Boot versions? Setting these correctly at this stage prevents runtime errors and saves hours of troubleshooting. The goal is to create a solid, compatible environment where your JSP files will work seamlessly.
Building The Project Structure
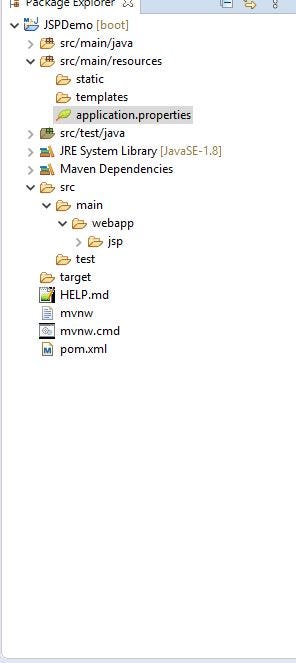
Building the project structure correctly is essential before you start creating JSP files in Spring Tool Suite. A well-organized structure helps you manage your files efficiently and avoids confusion as your project grows. It also ensures that Spring Boot can locate your JSP files and other resources without issues.
Organizing Folders
Your project folder structure should clearly separate source code, resources, and web components. Typically, JSP files belong inside the src/main/webapp/WEB-INF/viewsdirectory. This location keeps JSPs secure by preventing direct access from the browser.
Within the src/mainfolder, keep your Java classes under javaand static resources like CSS and JavaScript under resources/static. Such organization helps Spring Boot auto-detect components and serve static content properly.
Have you ever faced issues where JSP pages won’t load? Often, this is because of misplaced files. Keeping your folders tidy from the start saves you from this hassle.
Adding Dependencies
Adding the right dependencies to your pom.xmlor build.gradlefile is critical for JSP support in Spring Tool Suite. The spring-boot-starter-webdependency is essential, but you must also include the tomcat-embed-jasperand jstllibraries.
Here’s a quick example of the dependencies you need in your pom.xml:
| Dependency | Group ID | Artifact ID | Purpose |
|---|---|---|---|
| Spring Boot Starter Web | org.springframework.boot | spring-boot-starter-web | Core web functionalities |
| Tomcat Embed Jasper | org.apache.tomcat.embed | tomcat-embed-jasper | JSP engine |
| JSTL | javax.servlet | jstl | JSP Standard Tag Library |
Without these dependencies, your JSP files won’t compile or render. Have you checked your dependencies after setting up the project? It’s a small step that can save hours of debugging later.
Credit: medium.com
Creating The Jsp File
Creating the JSP file is a key step in building web applications using Spring Tool Suite. This file acts as the view layer, displaying the user interface. It allows you to embed Java code inside HTML, making pages dynamic and interactive.
Let’s explore how to create a JSP file and write basic code to get started quickly.
Navigating To Web Content
Start by opening your Spring Tool Suite workspace. Locate the project where you want to add the JSP file. In the Project Explorer, expand the project folder to find the src/main/webappdirectory. Inside this directory, look for the WEB-INFfolder. This is the standard location to store JSP files.
Right-click on the WEB-INFfolder, then select New > JSP File. A dialog box appears. Enter a meaningful name for your JSP file, such as index.jsp. Click Finishto create the file. The JSP file now appears under the WEB-INFfolder, ready for editing.
Writing Basic Jsp Code
Open the newly created JSP file. Start by adding the JSP page directive at the top. It tells the server how to process the page. Use this code:
<%@ page language="java" contentType="text/html; charset=UTF-8" pageEncoding="UTF-8" %> Next, write the basic HTML structure:
html My First JSP Page Hello, JSP in Spring Tool Suite!
This simple code shows a heading on the webpage. Save the file and run your project. The JSP page will load in the browser, displaying the message.
Configuring The Deployment Descriptor
Configuring the deployment descriptor is a key step in setting up JSP files in Spring Tool Suite. This file controls how your web application handles requests and responses. It defines servlet mappings and other settings needed for your JSP pages to work properly.
Proper configuration ensures your JSP pages load correctly and interact with the server as expected. It also helps in managing URL patterns and resources efficiently. Let’s explore how to edit the deployment descriptor and map your JSP page.
Editing Web.xml File
The deployment descriptor is typically named web.xml. It resides in the WEB-INFfolder of your project. Open this file to define servlets and other configurations.
Inside web.xml, add servlet declarations for your JSP files. Specify the servlet name and class. Use the tag for this purpose.
- Open
web.xmlin Spring Tool Suite - Locate the
root element - Add a new
section - Define the servlet name
- Set the servlet class as
org.apache.jasper.servlet.JspServlet
Save the file after editing. This setup links your JSP servlet correctly with the server.
Mapping The Jsp Page
Mapping connects URLs to your JSP pages. Use the tag inside web.xml. It tells the server which URL pattern triggers the JSP servlet.
Define the URL pattern to point to your JSP files. For example, use .jspto match all JSP pages.
| Tag | Description |
|---|---|
|
Maps a servlet to a URL pattern |
|
References the servlet declared earlier |
|
Specifies the URL pattern for JSP pages |
Example mapping:
jsp.jsp
This configuration ensures all JSP page requests are handled properly.
Credit: medium.com
Setting Up Spring Mvc
Setting up Spring MVC is a key part of creating JSP files in Spring Tool Suite. It acts as the backbone for handling web requests and responses efficiently. Without this setup, your JSP files won’t be able to communicate with your backend logic properly.
Defining Controller Class
Your controller class acts as the bridge between the user interface and the business logic. It listens for incoming requests and decides which view to show in response.
To define a controller, create a Java class and annotate it with @Controller. Inside, add methods mapped to specific URLs using @RequestMappingor @GetMapping. Each method should return a string that matches the name of the JSP file you want to display.
Think about how you want users to navigate your application. What URLs will they hit, and which views will they expect? Mapping these clearly in your controller simplifies your app’s flow and makes debugging easier.
Configuring View Resolver
The view resolver tells Spring MVC where to find your JSP files. Without it, Spring wouldn’t know how to translate the view names returned by your controller into actual JSP files.
In your Spring configuration file, add a bean for the InternalResourceViewResolver. Set properties like prefixand suffixto point to your JSP folder and file extension respectively.
This setup means when your controller returns “home”, Spring looks for /WEB-INF/views/home.jsp. Have you checked if your JSP files are placed in the correct folder? Misplacement is a common cause of “view not found” errors.
Running The Application
Running the application is the key to seeing your JSP file come alive in Spring Tool Suite. This stage involves deploying your project on a server and then verifying that your JSP page works as expected. It lets you confirm that your code produces the desired output and interacts smoothly with the backend.
Deploying the application correctly ensures a stable environment. Testing the JSP page checks that the user interface appears and behaves properly. Both steps are essential for a successful JSP application.
Deploying On Server
First, choose the server to deploy your Spring project. Common choices include Apache Tomcat or Jetty. Spring Tool Suite integrates with these servers, making deployment straightforward.
- Right-click your project in the Project Explorer.
- Select Run Asand then Run on Server.
- Pick the server you want to use from the list.
- Click Finishto start deployment.
The IDE will build and deploy your application. Watch the console for any errors during deployment. If all goes well, the server starts and hosts your JSP pages.
Testing Jsp Page
Open your web browser to test the JSP page. Use the URL provided by the server, usually something like http://localhost:8080/your-app-name/page.jsp.
- Check if the page loads without errors.
- Verify that all dynamic content appears correctly.
- Ensure links, forms, and buttons work as intended.
Refresh the page after making code changes to see updates. Testing often helps catch issues early. This step confirms your JSP file integrates well with Spring and the server.
Troubleshooting Common Issues
Troubleshooting common issues when creating JSP files in Spring Tool Suite helps maintain smooth development. These problems often arise from small mistakes or configuration errors. Identifying and fixing them quickly saves time and effort.
Understanding typical errors makes it easier to resolve them. Developers can focus more on building features than debugging. Here are key areas to check while working with JSP files in Spring Tool Suite.
Resolving Compilation Errors
Compilation errors usually come from syntax mistakes or missing libraries. Check your JSP code for typos and incorrect tags. Ensure all required Java classes and libraries are correctly imported in your project.
- Verify JSP tag usage matches the supported version.
- Confirm your Spring dependencies include JSP support.
- Clean and rebuild the project to clear stale errors.
- Check the console for detailed error messages.
- Use proper file encoding to avoid character errors.
Fixing Deployment Problems
Deployment issues often arise from configuration mistakes in the server setup. Make sure your server supports JSP and is properly linked to Spring Tool Suite.
- Restart the server after making changes to JSP files.
- Check the web.xml or Spring configuration for correct servlet mapping.
- Verify that the JSP files are in the correct directory under the webapp folder.
- Look for permission issues on the deployment folder.
- Review server logs for warnings or errors during startup.
Frequently Asked Questions
What Is A Jsp File In Spring Tool Suite?
A JSP file is a JavaServer Page used to create dynamic web content. In Spring Tool Suite, it handles view rendering in MVC architecture.
How To Create A New Jsp File In Spring Tool Suite?
Right-click the WebContent folder, choose New > JSP file, name it, and click Finish. The JSP file is now ready.
Why Use Jsp Files In Spring Mvc Projects?
JSP files separate view logic from business logic. They simplify dynamic HTML generation and integrate smoothly with Spring MVC.
How To Configure Jsp View Resolver In Spring Tool Suite?
Define an InternalResourceViewResolver bean in your Spring config. Set prefix and suffix to locate JSP files correctly.
Conclusion
Creating a JSP file in Spring Tool Suite is simple and clear. Follow the steps carefully to avoid mistakes. This process helps build dynamic web pages easily. Practice makes the task easier each time. Keep exploring Spring Tool Suite features to improve your skills.
Small efforts lead to better results in web development. Start creating your JSP files today and see the progress yourself.