Are you struggling to fix mistakes on your Pro Tools audio track without redoing the entire recording? Learning how to punch in can save you time and keep your creative flow intact.
You’ll discover simple, step-by-step methods to punch in like a pro. Whether you’re a beginner or want to sharpen your editing skills, this guide will help you work smarter and achieve cleaner, more polished recordings. Keep reading to unlock the secrets that make punch-in editing quick and easy.
Equipment And Software Requirements
Before you start punching in on a Pro Tools audio track, ensuring you have the right equipment and software is crucial. The quality of your gear directly affects your recording experience and final sound. Let’s break down what you need to get started efficiently and effectively.
Hardware Essentials For Punching In
Your hardware sets the foundation for smooth punch-ins. A reliable audio interface is key—it acts as the bridge between your microphone and Pro Tools software.
- Audio Interface:Look for low latency and multiple inputs if you plan on recording several tracks.
- Microphone:Choose a mic suited to your instrument or voice; dynamic mics work well for loud sources, while condensers capture detail.
- Headphones or Studio Monitors:Accurate monitoring helps you catch any mistakes during punch-ins.
- MIDI Controller (Optional):Useful if you want to add virtual instruments or control playback hands-free.
Pro Tools Software Requirements
Make sure your Pro Tools version supports punch recording features. Pro Tools Standard and Ultimate both allow punch-ins, but Ultimate offers more advanced options.
- Pro Tools Version:Confirm you have at least Pro Tools 12 or later for the best experience.
- System Compatibility:Your computer should meet Avid’s recommended specs for smooth operation without glitches.
- Plugins and Effects:Having a few essential plugins ready can help you enhance your recording right away.
Additional Tools That Make Punching In Easier
Some extras can make your workflow smoother and your punch-ins more precise.
- Control Surface:Physical control surfaces let you manage transport and punch controls without touching the mouse.
- Footswitch:Hands-free punch start/stop can be a game-changer during live takes.
- Dedicated Recording Space:While not a tool, a quiet, treated room significantly improves recording quality.
Have you ever struggled with timing during punch-ins? With the right setup, you can focus on your performance instead of technical hiccups. What equipment do you currently have, and is it really helping you nail those perfect takes?

Credit: m.youtube.com
Setting Up Your Pro Tools Session
Setting up your Pro Tools session correctly is the foundation for smooth punch-in recording. Without proper preparation, you might face issues like missed takes or confusing signal paths. Taking a few moments to organize your session will save you frustration and keep your focus on capturing the best performance.
Creating A New Track
Start by adding a new audio track dedicated to your punch-in recording. Choose between mono or stereo based on the source you’re recording. Pro Tools lets you create multiple types of tracks, but for punch-ins, a standard audio track is usually best.
Here’s how to do it:
- Go to the Track menu and select “New.”
- Set the track type to “Audio Track.”
- Choose the number of tracks you want to create and whether they’re mono or stereo.
- Click “Create” to add the track to your session.
Think about naming the track clearly, like “Vocals Punch-In,” so you can easily identify it later. Have you ever lost time searching through a cluttered session? Clear naming helps avoid that.
Configuring Input And Output
After your track is created, the next step is to assign the correct input and output. This tells Pro Tools where your audio signal comes from and where it should go.
To set the input:
- Click the input selector on your new track’s channel strip.
- Choose the input that corresponds to your microphone or instrument.
For the output:
- Click the output selector on the same channel strip.
- Choose the output connected to your monitoring system or headphone mix.
Remember, wrong input settings can cause you to record silence, while incorrect output can make it impossible to hear your performance. Double-checking these settings before you punch in can save you from wasted takes. What’s one input/output mistake you’ve made and how did you catch it?
Understanding Punch In And Punch Out
Punching in and punching out are key techniques in audio recording. They let you fix parts of a track without redoing everything. This saves time and keeps the performance natural.
Punch in means starting to record over a specific part of the track. Punch out means stopping that recording at the right moment. Both need precise timing to blend smoothly with the original audio.
What Is Punch In?
Punch in allows you to record only a small section of a track. This is useful when there are mistakes or parts to improve. Instead of recording the whole track, you just replace the part you want.
This keeps the rest of the track intact. It also helps keep the original feel of the performance.
What Is Punch Out?
Punch out is the point where you stop recording during a punch in. You need to stop at the exact right moment. This avoids cutting off parts you want to keep.
The goal is to make the new recording fit perfectly. The transition between the old and new audio should be smooth and natural.
Why Punch In And Punch Out Matter
These techniques save time and effort in recording. They help fix small errors without redoing the entire track. Punch in and punch out keep the flow of the performance.
They also reduce unwanted noises or pauses. Proper use makes the final track sound polished and professional.
Preparing For Punch In Recording
Punch in recording is a precise technique in Pro Tools that lets you fix small sections without redoing entire tracks. Getting ready for this process is crucial for smooth, error-free results. Proper preparation saves you time and helps keep your creative flow uninterrupted.
Selecting The Right Track
Before you punch in, identify the exact track that needs correction. Make sure it’s armed for recording and not accidentally muted or routed incorrectly.
Think about whether you want to punch in on a vocal, guitar, or drum track. Each instrument might require different settings or monitoring setups.
Check if the track is grouped with others. Punching in on one track in a group could affect the whole set, so solo the track if needed.
Setting Punch Points
Decide the start and end points of your punch carefully. Setting punch points too close can cause awkward transitions or missed notes.
Use Pro Tools’ selection tool to highlight the exact area where you want to replace the audio. Zoom in to see waveform details and avoid cutting off important sound.
Try setting punch points a little before and after the mistake. This overlap helps blend the new recording with the original smoothly.
Ask yourself: Have you left enough room to get into the groove without rushing the take? Proper punch points let you focus on performance, not technical issues.
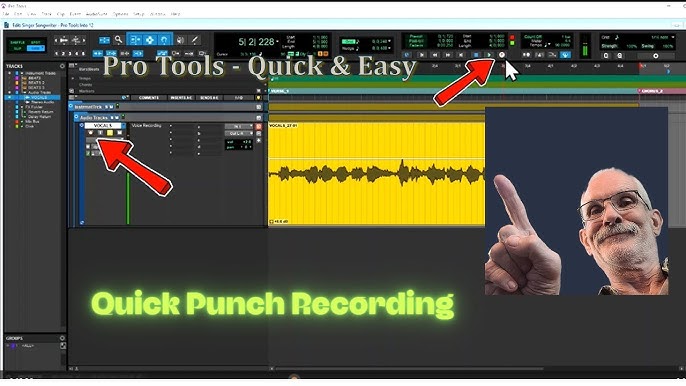
Executing Punch In On A Track
Punching in on a Pro Tools audio track lets you fix mistakes or add new parts without redoing the entire take. It gives you control and precision, helping you maintain the flow of your session. Understanding how to execute a punch in correctly can save you time and improve your recordings.
Manual Punch In
Manual punch in means you control when the recording starts and stops by pressing the record button yourself. You listen carefully and hit record right before the part you want to redo, then stop once you’re done. This method requires good timing and focus, but it gives you full control over the process.
One tip: Practice the timing with the playback before recording. It helps you avoid cutting off important parts or missing the punch in point. Have you ever felt frustrated because you punched in too early or too late? Manual punch in puts that control in your hands, so stay alert and ready.
Automatic Punch In
Automatic punch in lets you set specific points on the timeline where Pro Tools starts and stops recording by itself. You mark the punch in and punch out locations, so the software handles the timing for you. This reduces stress and lets you focus more on your performance.
To set it up, enable the punch in and punch out markers and make sure your transport is in record mode. This is especially helpful when you need to punch in at tricky spots or if you want to avoid distractions. Have you tried this before? It often saves multiple takes and keeps your workflow smooth.
Editing And Refining Recorded Audio
Editing and refining recorded audio is where your punch-in takes shape. This stage transforms raw takes into polished tracks, ensuring every note fits seamlessly. It’s your chance to fix timing, clean up unwanted noise, and smooth transitions.
Trimming Edits
Trimming is about cutting the excess around your punch-in without losing the natural flow. You want to isolate the best parts while keeping the edits tight enough to avoid gaps or overlaps.
Use Pro Tools’ trim tool to shorten or extend regions precisely. Zoom in closely to catch any tiny clicks or pops at the edit points. Sometimes, adjusting the start or end by just a few milliseconds makes all the difference.
Ask yourself: does this edit sound natural? If it feels abrupt, try nudging the trim slightly or listen to the transition repeatedly. Your ears are the best judge here.
Crossfading Audio
Crossfades help blend your edits smoothly, preventing abrupt changes or clicks. Pro Tools makes it easy to create fades that overlap adjacent clips, softening the join.
Try different fade shapes like equal power or linear to see which fits your audio best. A quick fade-in and fade-out can often save an otherwise rough cut.
Remember, the goal is to make the edit invisible. If you can hear where one take ends and another begins, tweak the crossfade length or curve. Perfecting crossfades often requires patience, but it’s essential for professional-sounding results.
Troubleshooting Common Issues
Running into issues while punching in on a Pro Tools audio track can be frustrating. Understanding the common problems helps you fix them quickly and keep your workflow smooth. Let’s look at typical challenges and how to solve them effectively.
Latency Problems
Latency can throw off your timing and make it hard to nail your punch-ins. This delay happens when there’s a lag between your input and what you hear. It’s especially noticeable if you’re recording with effects or using multiple plugins.
To reduce latency, try these steps:
- Lower your buffer size in the playback engine settings. Smaller buffer sizes reduce delay but may increase CPU load.
- Turn off any unnecessary plugins while recording. Effects like reverb or delay often add latency.
- Use direct monitoring if your audio interface supports it. This lets you hear your input signal without going through the computer first.
Have you noticed your timing slipping during punch-ins? Adjusting latency settings can make a big difference.
Audio Distortion
Distortion during punch-in recordings usually points to input levels being too high. Clipping causes unpleasant distortion and ruins takes.
Keep these tips in mind to avoid distortion:
- Check your input gain and keep it below 0 dB on the meter.
- Use a pad or attenuator if your source is too loud.
- Watch the levels on both the track and your audio interface to prevent overload.
I once had a session ruined by unnoticed clipping during punch-ins. After that, I always double-check input levels before recording. What’s your go-to method for keeping distortion in check?
Credit: www.production-expert.com
Tips For Efficient Recording
Efficient recording in Pro Tools can save you time and keep your creative flow intact. The key lies in mastering simple techniques that help you punch in smoothly without interrupting your session. Let’s dive into practical tips that will make your recording process faster and more intuitive.
Using Keyboard Shortcuts
Keyboard shortcuts are your best friends when punching in on an audio track. They reduce the need to navigate menus, keeping you focused on the music. For instance, pressing Command + Space(Mac) or Control + Space(Windows) quickly starts and stops playback.
Another useful shortcut is Command + 5on the numeric keypad to open the transport window, which lets you control recording functions without clicking around. You can even set custom shortcuts for punch-in and punch-out points, so you don’t miss the exact spot you want to re-record.
Have you ever lost your groove because you had to grab the mouse during a crucial moment? Using shortcuts keeps you in the zone and cuts down on mistakes.
Maintaining A Smooth Workflow
Keeping your workflow smooth means preparing your session before you hit record. Set clear punch-in and punch-out points to avoid accidental overwrites. Pro Tools lets you do this precisely by using the timeline selection or markers.
Another tip is to use playlists for each take. This way, you can easily switch between different versions without cluttering your session. Playlists keep your tracks organized and make editing less stressful.
Also, consider arming only the track you want to punch in on. This prevents unwanted recording on other tracks and reduces system load. Have you tried locking your tracks after you’re done recording? It’s a simple step that protects your work from accidental changes.

Credit: www.production-expert.com
Frequently Asked Questions
How Do I Enable Punch Recording In Pro Tools?
To enable punch recording, go to the Transport window. Click the “Punch In” button. Set your punch-in and punch-out points on the timeline. This activates punch mode for precise recording within the selected range.
What Are The Steps To Punch In On An Audio Track?
First, arm the audio track for recording. Set punch-in and punch-out points on the timeline. Press record, and Pro Tools will start recording only within these points automatically.
Can I Punch In Multiple Audio Tracks Simultaneously?
Yes, you can punch in multiple tracks at once. Arm all desired audio tracks before hitting record. Pro Tools will record on all armed tracks during punch-in.
How To Avoid Audio Glitches During Punch Recording?
Ensure your system latency is low. Use a fast hard drive and buffer size settings optimized for recording. Also, pre-roll a few seconds before punch-in to stabilize playback.
Conclusion
Punching in on a Pro Tools audio track is simple with these steps. Practice helps build confidence and speed. Always set clear punch points before recording. Use loop playback to check your takes. Keep your session organized for easy editing.
Small adjustments can improve your final sound. Stay patient and keep experimenting with tools. Recording becomes smoother as you gain experience. Enjoy the process and trust your ears. This skill makes your audio projects sound better.