Have you ever looked at your car’s windows and wished the tint was gone? Maybe it’s bubbling, peeling, or just not the shade you want anymore.
Removing window tint from your auto glass might seem tricky, but you can do it yourself without spending a fortune. You’ll discover simple, step-by-step methods to get your windows clear and flawless again. Keep reading, and you’ll find out exactly how to make your car look fresh and new—no hassle, no stress.
Essential Tools
Removing window tint from your car’s glass might seem tricky at first, but having the right tools can make a huge difference. Without proper equipment, you could waste time or damage your windows. Let’s look at what you need to get the job done smoothly and safely.
Safety Gear
Protecting yourself is the first priority. Wear gloves to avoid cuts from broken glass or sharp tint edges. Safety goggles shield your eyes from chemicals or debris. Don’t skip this step; your safety matters more than speed.
Heat Source
Heating the tint softens the adhesive, making it easier to peel off. A handheld heat gun works best, but a hairdryer can also do the trick if you don’t have one. Keep the heat moving to avoid cracking the glass or overheating the tint.
Plastic Scraper Or Razor Blade
A plastic scraper helps lift the tint without scratching your windows. If you’re experienced, a razor blade can speed up the process but handle it carefully to avoid damage. Test on a small spot first to see what works best for your glass type.
Adhesive Remover
After peeling the tint, some sticky residue will remain. Use an adhesive remover spray or a mixture of soapy water and vinegar to clean it off. Applying the remover and letting it sit for a few minutes makes wiping the residue much easier.
Microfiber Cloths
Microfiber cloths are perfect for wiping off adhesive and cleaning the glass afterward. They won’t leave lint or scratches. Keep several on hand for different cleaning stages to avoid smearing.
Do you have these tools ready? Skipping even one can turn a simple task into a frustrating experience. Gather them first, and your tint removal will feel much more manageable.

Credit: fixitautoglass.ae
Precautions Before Starting
Before you begin removing window tint from your car’s glass, taking a few precautions can save you time, money, and frustration. Handling the process carelessly might damage your auto glass or leave stubborn adhesive residue behind. Preparing properly ensures a smoother, safer tint removal experience.
Check Your Tools And Materials
Gather everything you need before starting. You’ll want items like a razor blade, heat gun or hairdryer, adhesive remover, gloves, and plenty of microfiber cloths. Having these ready prevents interruptions and reduces the risk of using makeshift tools that could scratch your glass.
Think about the quality of your tools too. A dull blade won’t cut through the tint film effectively, and a low-powered heat source might not soften the adhesive enough. Investing a little more upfront can make the job far easier.
Work In A Well-ventilated Area
Many adhesive removers release strong fumes that can irritate your eyes and lungs. Removing tint in an open space or a garage with good airflow protects your health. If you’re using chemicals, consider wearing a mask to avoid inhaling harmful vapors.
Have you noticed how cramped spaces make any task more stressful? Giving yourself room to move and breathe will help you stay focused and avoid mistakes during removal.
Protect Your Car’s Interior And Exterior
Window tint removal can get messy. Protect your car’s interior with old towels or plastic sheeting to catch drips of adhesive remover or bits of film. Don’t forget to cover your dashboard and seats.
On the outside, be careful with your car’s paint. Avoid scraping near the painted surfaces, and wipe off any chemical spills quickly. Taking these steps prevents accidental damage that could cost more to fix than the tint removal itself.
Understand Your Tint Type And Local Laws
Not all window tints are the same. Some are dyed films, while others are metallic or ceramic. Each type responds differently to heat and scraping. Knowing what you’re dealing with helps you choose the best removal technique.
Also, check local regulations about tint levels before removing it. Sometimes, removal is necessary to comply with legal limits, but other times you might want to replace it instead. Are you aware of the tint laws in your area?
Soap And Water Method
The soap and water method is a gentle yet effective way to remove window tint from your car’s glass. It uses simple household ingredients and doesn’t require harsh chemicals or expensive tools. This approach works best on newer tints or when you want to avoid damaging the glass.
Preparing The Solution
Start by mixing warm water with a few drops of dish soap in a spray bottle. The soap helps to loosen the adhesive holding the tint in place. Avoid using harsh detergents, as they can leave residues or damage the glass.
Shake the bottle gently to combine the ingredients thoroughly. Having a well-mixed solution ensures even coverage when you apply it to the window. You’ll want enough solution to spray generously on the tint.
Application Process
Spray the soap and water solution evenly across the entire surface of the tinted window. Make sure the tint is fully saturated, especially along the edges, where the adhesive tends to be strongest.
Let the solution sit for about 10 to 15 minutes. This waiting period softens the adhesive, making the tint easier to peel off. If you notice the solution drying up too quickly, simply spray again to keep the area moist.
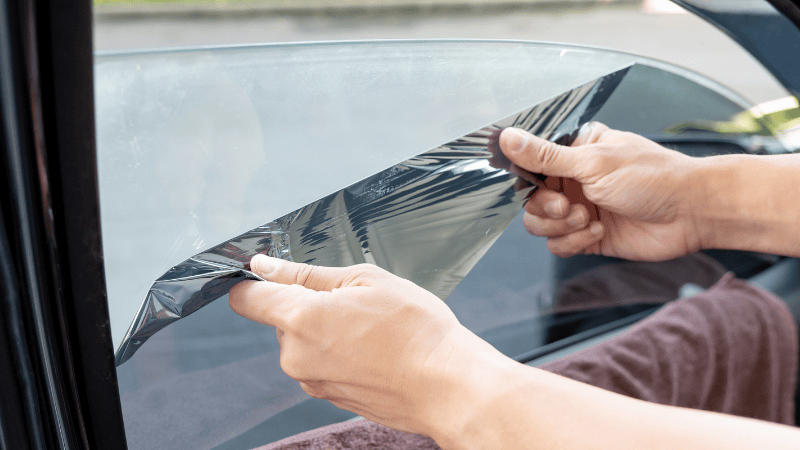
Peeling The Tint
Start peeling the tint from one corner of the window. Use your fingernail or a plastic scraper to lift the edge gently. Avoid metal tools as they can scratch the glass.
Pull the tint slowly and steadily, keeping it close to the glass to minimize tearing. If the tint resists, spray more soap and water to loosen the adhesive further. Patience is key here—rushing can leave behind sticky residue or cause the tint to break into small pieces.
Have you ever tried peeling off a stubborn tint? How did you tackle the sticky mess? Share your experience or questions below!
Heat Gun Technique
The Heat Gun Technique offers a powerful way to remove window tint from your auto glass without scratching or damaging it. This method uses controlled heat to soften the adhesive, making the tint peel off more easily. If you’re ready to tackle this task yourself, understanding how to properly use a heat gun is essential for safety and effectiveness.
Setting Up The Heat Gun
Start by choosing a heat gun with adjustable temperature settings. Set it to a medium heat level to avoid overheating the glass or damaging the car’s interior. Always wear heat-resistant gloves to protect your hands and work in a well-ventilated area to avoid inhaling fumes.
Before turning on the heat gun, clean the window surface lightly to remove dirt. This helps the heat penetrate evenly and prevents debris from scratching the glass during removal. Keep a spray bottle with water nearby to cool down the glass if it gets too hot.
Heating The Tint
Hold the heat gun about 4 to 6 inches away from the glass. Move it slowly back and forth across the window to evenly heat the tint film. Focus on a small section at a time—around 6 to 8 inches—so the adhesive softens without burning.
You’ll notice the tint becomes more flexible and easier to peel once heated properly. Use a plastic scraper or your fingernail to lift the edge of the tint carefully. If the film resists, apply more heat rather than forcing it off to avoid cracking the glass.
Removing Residue
After peeling off the tint, sticky adhesive residue often remains on the glass. To remove it, spray the window with a mixture of warm water and dish soap or use a commercial adhesive remover designed for auto glass. Let the solution sit for a few minutes to break down the residue.
Scrub gently with a soft cloth or plastic scraper to clear away the adhesive. Avoid metal tools that can scratch the glass. Wipe the window clean with a microfiber towel and inspect for any leftover spots—you may need to repeat this step for stubborn areas.
Steam Cleaner Approach
The steam cleaner approach offers a powerful and chemical-free way to remove window tint from your car’s glass. It uses high-temperature steam to soften the adhesive, making the tint easier to peel off without damaging the glass. If you’re looking for a method that’s both effective and gentle, this could be the solution you need.
Using The Steam Cleaner
First, ensure your steam cleaner is fully heated and producing consistent steam. Hold the steam nozzle a few inches away from the window tint to avoid excessive moisture buildup. Move the steam in slow, overlapping motions to evenly heat the adhesive beneath the tint film.
You’ll notice the tint starting to loosen as the adhesive softens. Patience is key here—rushing can cause tearing or leave residue behind. Have a microfiber cloth handy to wipe off any excess moisture as you work.
Peeling Off The Film
Once the adhesive feels soft, gently lift a corner of the tint using your fingernail or a plastic scraper. Avoid metal tools to prevent scratching the glass. Slowly peel the film back, keeping it as close to the glass as possible to reduce the chance of tearing.
If the tint resists, apply more steam to that area before continuing. You’ll find that the softened adhesive makes removal smoother and less frustrating. Don’t worry if small pieces remain; these can be tackled in the next step.
Cleaning The Glass
After removing the tint, you’ll likely see sticky adhesive residue left on the glass. Use the steam cleaner again to loosen this residue. Then, apply a glass cleaner and wipe with a clean cloth to restore clarity.
For stubborn spots, a mixture of warm water and a few drops of dish soap can help break down the adhesive. Have you tried this approach before? You might be surprised how much easier the process feels when you rely on steam’s natural power rather than harsh chemicals.
Ammonia And Plastic Method
The ammonia and plastic method is a popular way to remove window tint from your car’s glass without causing damage. It uses the power of ammonia to loosen the adhesive, while plastic wrap traps the fumes and moisture, making the tint easier to peel off. This approach requires patience but offers a chemical-free experience compared to other harsh solvents.
Applying Ammonia
Start by spraying a generous amount of ammonia onto the tinted window. Make sure you wear gloves and work in a well-ventilated area to avoid inhaling fumes. The ammonia breaks down the glue holding the tint, so don’t rush; allow it to sit for at least 10 to 15 minutes.
Covering With Plastic
Once the ammonia is applied, immediately cover the window with a layer of plastic wrap. Use clear plastic that clings tightly to the glass to keep the ammonia trapped and working on the adhesive. This step is crucial because it keeps the ammonia from evaporating too quickly and maximizes its effectiveness.
Removing The Tint
After about 30 to 45 minutes, gently peel back the plastic wrap and start lifting the tint from one corner. If the tint resists, spray more ammonia under the plastic and wait a bit longer. Use a plastic scraper or your fingernail to avoid scratching the glass as you pull the film away.
Dealing With Adhesive Residue
After removing window tint, sticky adhesive residue often remains on the glass. This residue can be stubborn and affect visibility. Removing it carefully is important to keep your auto glass clear and clean.
Proper tools and materials make the process easier. Using the right approach prevents scratches and damage. Two common methods work well for removing adhesive residue: applying adhesive remover and scraping off residue.
Using Adhesive Remover
Choose a commercial adhesive remover designed for auto glass. Spray or apply the remover generously on the residue. Let it sit for several minutes to soften the adhesive. Avoid letting it dry completely.
Use a clean cloth to wipe the softened residue away. Repeat the process if needed until the glass is clear. Always follow the product’s safety instructions. Work in a well-ventilated area to avoid inhaling fumes.
Scraping Off Residue
Use a plastic scraper or a razor blade at a low angle. Hold the scraper gently to avoid scratching the glass. Start scraping from one edge and move slowly across the residue. Apply light pressure and be patient.
Keep the glass wet with water or adhesive remover while scraping. This helps reduce friction and prevents damage. Clean the glass with soap and water after scraping. Dry it with a microfiber cloth for a streak-free finish.
Safety Tips
Removing window tint from your car’s glass requires care and attention. Safety should be your top priority. Taking proper precautions protects you and prevents damage to your vehicle. Follow these important safety tips to make the process smooth and secure.
Wear Protective Gloves And Eye Gear
Protect your hands from sharp edges and chemicals. Use gloves that resist cuts and chemicals. Wear safety glasses to shield your eyes from debris and cleaning agents. This reduces the risk of injury during tint removal.
Work In A Well-ventilated Area
Many tint removal products release fumes. These can cause dizziness or breathing problems. Choose an open space or a garage with open doors. Good airflow helps keep the air fresh and safe to breathe.
Use Proper Tools Carefully
Use a razor blade or scraper with caution. Avoid applying too much pressure to prevent glass scratches. Hold tools at the correct angle to lift tint film without damage. Keep tools clean and sharp for better control.
Avoid Direct Sunlight And Heat Overexposure
Working under direct sunlight can make tint removal harder. Heat can warp the glass or cause burns. Pick a shaded spot or work during cooler parts of the day. This keeps the surface cooler and safer to handle.
Keep Children And Pets Away
Chemicals and sharp tools are dangerous for kids and animals. Make sure the area is clear before starting. This prevents accidental injuries and distractions.
Common Mistakes To Avoid
Removing window tint from your car’s glass might seem straightforward, but many people fall into avoidable traps. These mistakes can damage your glass, make the process longer, and increase frustration. Knowing what to avoid helps you save time and keeps your windows in perfect shape.
Using Sharp Objects To Peel Off Tint
It’s tempting to grab a razor blade or knife to scrape the tint quickly. But this can easily scratch or chip your glass. Instead, use tools designed for tint removal like plastic scrapers or carefully soften the adhesive with heat before peeling.
Skipping The Heat Treatment
Trying to remove the tint without warming the adhesive is a common error. Cold adhesive is stubborn and tears unevenly. Applying heat with a hairdryer or heat gun loosens the glue, making the tint come off in larger, manageable pieces.
Not Protecting Your Hands And Eyes
Many overlook safety precautions, risking cuts and eye irritation from adhesive particles. Always wear gloves and protective eyewear. This simple step keeps you safe and focused on the job.
Rushing Through The Process
Removing tint is a patience game. Hurrying can cause you to miss spots or damage the glass. Take your time and work methodically, checking your progress frequently to avoid unnecessary mistakes.
Ignoring Residue Cleanup
Leaving adhesive residue on your windows can attract dirt and affect visibility. Using proper adhesive removers or a mixture of soap and water after peeling off the tint ensures a clean, clear finish.
Neglecting Environmental Conditions
Working in extreme cold or direct sunlight can affect how easily the adhesive softens and peels. Choose a shaded, warm area to work comfortably and get better results.
Have you ever tried to remove window tint without heat? How did that work out? Avoiding these common mistakes will make your tint removal smoother and protect your car’s glass from unnecessary harm.
Credit: carlikefilm.com
Maintenance After Removal
After removing window tint from your auto glass, proper maintenance is crucial to keep your windows clear and damage-free. The removal process can leave adhesive residue or tiny scratches that may affect visibility and the overall look of your vehicle. Taking care of your glass right away helps restore its original condition and prevents long-term issues.
Cleaning Residue And Adhesive
Sticky residue often remains after tint removal, and ignoring it can cause dirt buildup over time. Use a glass cleaner specifically designed for auto windows or a mixture of vinegar and water for gentle but effective cleaning.
Apply the cleaner with a microfiber cloth, wiping in circular motions to lift off adhesive traces without scratching the glass. If residue is stubborn, try a little rubbing alcohol on a soft cloth, but test it on a small area first to avoid damage.
Inspecting For Glass Damage
Check your windows carefully for any scratches, chips, or cracks that might have appeared during the tint removal. Even small imperfections can worsen with temperature changes or road vibrations.
If you spot damage, consider consulting a professional for repair before it spreads. Ignoring minor scratches can reduce your window’s clarity and potentially compromise your safety.
Applying Protective Treatments
Once your glass is clean and damage-free, adding a protective coating can keep it looking good longer. Water-repellent treatments or anti-fog sprays improve visibility and make future cleaning easier.
These treatments create a thin barrier that helps prevent dirt and water spots, especially if you drive in rainy or dusty areas. Have you tried these products before? They can make a noticeable difference on your daily commute.
Regular Window Care Tips
- Clean your windows weekly to avoid buildup of grime and pollutants.
- Use a soft, non-abrasive cloth to prevent scratches.
- Avoid harsh chemicals that can weaken the glass or leave streaks.
- Park in shaded areas to reduce sun damage to your glass and car interior.
Developing a simple routine for your auto glass can extend its lifespan and keep your vehicle looking sharp. What is your current window care routine? Small changes can lead to big improvements.

Credit: www.youtube.com
Frequently Asked Questions
How Do I Safely Remove Window Tint From Auto Glass?
Use a heat gun or hairdryer to soften the adhesive. Peel the tint slowly from a corner. Clean residue with soapy water and a scraper.
What Tools Are Needed For Removing Window Tint?
You need a heat source, a razor blade scraper, and soapy water. A microfiber cloth helps clean the glass afterward.
Can I Remove Window Tint Without Professional Help?
Yes, with patience and the right tools, you can do it yourself. Follow safety steps to avoid glass damage.
How Long Does It Take To Remove Window Tint?
Removing tint usually takes 30 to 60 minutes per window. Time varies by tint age and adhesive strength.
Conclusion
Removing window tint from auto glass takes patience and the right tools. Start with heat and peel carefully to avoid damage. Use adhesive remover for sticky residue left behind. Clean the glass thoroughly to restore clear visibility. Taking your time helps prevent scratches and mess.
Following these simple steps makes the process easier and safer. Your car windows will look clean and bright again. Keep these tips in mind for a smooth tint removal experience.